How to Draw a Pandahow 2 Draw Animals

For this painting I'm definitely in the realm of fantasy, to the point where the proportions, lighting and physics are not in any way realistic.
I'll be focusing mainly on how to draw the character. In the past I've found that it's sometimes better to exaggerate their proportions and accentuate their curves, which coincidently improves the composition.
Usually the use of curves on any character makes them more appealing to look at, because it presents a very smooth and pleasing shape and line to the viewers.
During my art process I try to exaggerate realistic light and make it more vivid and prominent, so that it puts more focus on the character. A character's face is the heart of any composition and I usually spend a lot of my time on it.
Watch the full tutorial
The face tells us what the character is feeling and is usually the first place a viewer looks. Naturally, I always start off with various versions of the image, just to be sure that I paint a character in a strong pose.
My approach towards colours is based on how well they complement each other. Warm colours, for example, are vivid and energetic, and tend to advance in space, whereas cool colours give an impression of calmness, and create a cool soothing feeling.
The trick is to experiment with merging the two harmoniously throughout the composition. For example, orange and blue (or orange and green) are contrasting colours, yet complement each other very nicely in nature. The overall lesson is that trying out new things and new tools can help us artists develop our own techniques and art styles.
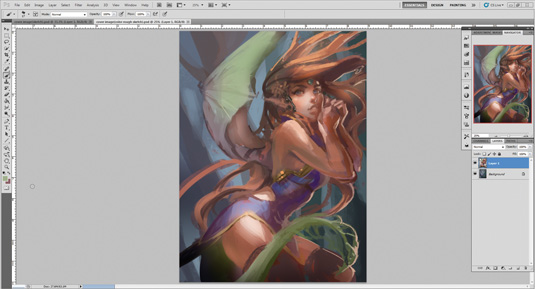
01. Establishing the composition
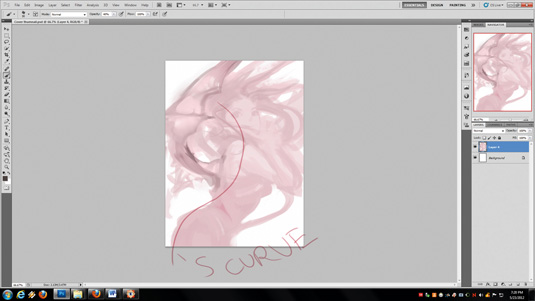
I create the general shape of the character in one colour. This is similar to thumbnailing; you want to find a shape that complements the canvas.
I create an S-curve that runs down the spine of the character. I also roughly block in the hair by making it very loopy and curved, reinforcing the S-curve theme. For this I use my favourite brush, the Chalk brush, with the Transfer option checked on, for a soft, blendy feel.
02. Colour in the thumbnail
I start applying darker tones to the character and the background. I paint the background with a darker colour because I want the character to stand out.
At this point I just want to have a dark solid colour to paint from, because in the next step I'll be adding lighter shades. I use this approach for blending colours because having a main dark colour will result in a more uniform finish and will add pleasing pink tones to the character.
I'm using the Chalk brush and the brush next to it, which has a bit of texture already on it. This is where you start to see a bit of texture in the hair swirls.
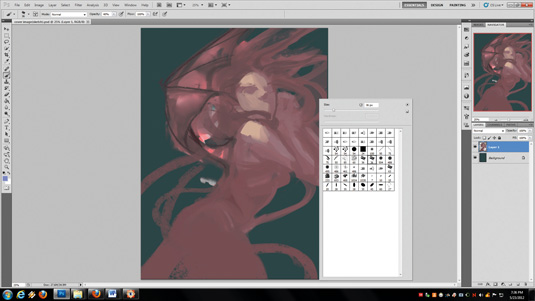
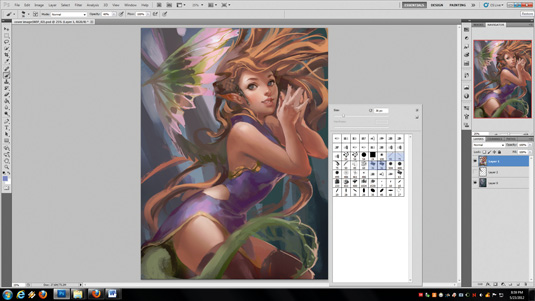
03. Start blocking colours
I start by blocking in some basic colours I want my character to have. Usually I envision colours that go well together and then apply them to the character.
In this case I decide that orange hair and green wings combine quite nicely. In real life, people with naturally red hair tend to have green eyes or look good in green clothing. I try to paint the character with warm colours, while the background and wings have more of a cool tone.
Usually an image is more interesting when it incorporates contrasting tones. For this step I'm sticking with the Chalk brush and using a bigger brush size to block out larger areas of the image, such as the wings, skin and the dress.
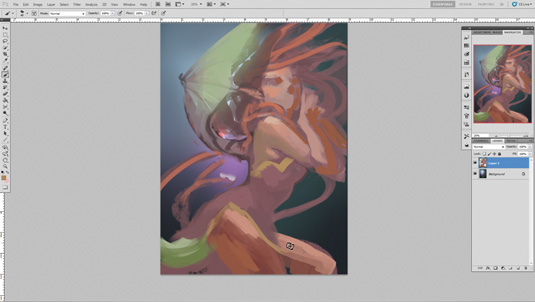
04. Adding atmosphere to the character
A quick trick I use during the colour blocking stage involves the Airbrush tool. I select the tool, set the Color mode to Overlay and apply some highlights to the character.
I then work with a larger brush size to cover a general area of the character, then reduce the Opacity to between 10 and 40 per cent, depending on the intensity of the overall lighting and shading.
This introduces a bit of variation to the colours and avoids making the character looking flat.
05. Lighting and shading
Now that I've got a general feel of my character, I focus on the lighting and the shading. I start blending the colours and pick darker tones, using the Chalk brush and sometimes my 'Combo 2' brush.
When blending I usually keep the Opacity at 100 per cent, enabling me to generate more of a solid and rough feel. At this stage I'm now focusing on establishing a rough overall light and shadow pass to the character.
Keep in mind that if the opacity is lower than 50 per cent for whatever brush you use, the blending will be smoother and more even. This type of blending is used more towards the end of the process, when I'm finalising parts of the image such as smoothing out skin or clothing.
06. Blend and fix
Now that I have a decent rough base it makes it easier to find faults in my image and I start changing any elements I find that I'm unhappy with.
In this case I decide to make her right shoulder more visible, making her look as if she's leaning towards the viewer a little. I start to refine the wings and start blending some of the element of the character, such as the face and the dress. I'll use my two Chalk brushes and the two Costume brushes.
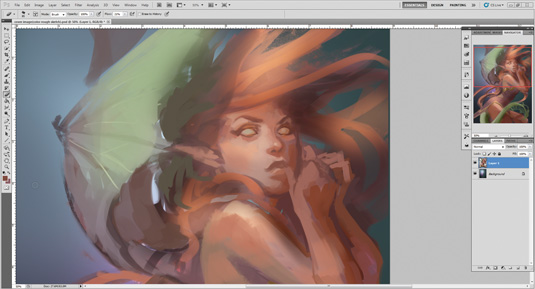
07. Focus on the wings
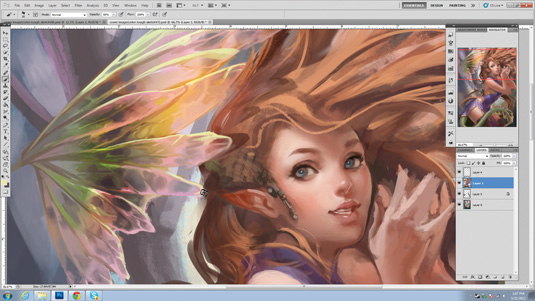
Now that I'm happy with a rough blending of my work, I start blending and smoothing each area of the character. I start by refining the wings; here the wings of an insect really inspired me so I decide to make the wings translucent.
I then start adding some lines on the wings while picking up some of the background colour and painting it directly onto the wings, therefore making them translucent.
For example, I'm picking up some of the brown tone of the tree and painting it onto the wings. Finally, I start adding highlights at the edge of each wing lobe, which makes the wings stand out.
Next page: 8 more steps to creating a fantasy manga female...
How to Draw a Pandahow 2 Draw Animals
Source: https://www.creativebloq.com/digital-art/how-paint-fantasy-manga-female-101517378
0 Response to "How to Draw a Pandahow 2 Draw Animals"
Post a Comment